
Sample packs are a good way to expand your sonic palette, and can help give you inspiration to make new music. Sample packs can include both loops and one-shot sounds, and in this guide on how to use sample packs in music we’ll show you how to make a chilled lo-fi song from scratch.
Jump to these sections:
For this guide we’ll be using Native Instruments Burnt Hues, Drift Theory, Faded Reels and Hazy Days expansions, specifically the new “WAV-only” editions.
You can pick and choose your favorite packs for only $14.50 this Summer of Sound, or bundle up with all five for only $49.50.
We’ll also use Komplete Kontrol to play back the sounds, plus Raum reverb and Replika XT delay for added atmosphere.
What are samples in music?
Samples are sounds that can be used to make music. They’re called “samples” because the way digital audio recording works is by taking a sample of the level of the input signal at regular intervals (known at the sample rate), and this is used to make a file that recreates the sound. Hence, “sample” has become shorthand for a digital audio recordings in the music production realm.
Samples can come in various forms, and are often “loops” (usually rhythmic material of a specific number of bars that can be played repeated to create a backing), and “one-shots” (a single sound that can be played back rhythmically and chromatically, i.e. pitched up and down a keyboard).
What is a sample pack?
A sample pack is a collection of sounds, often designed to work well together to create a specific style of music. Native Instruments Expansions are sample packs that also include instrument presets, and now expansions are available in “WAV-only” editions that just feature the sample content.
How to create a dynamic track with sample packs
1. Find a musical foundation
The packs we’re going to use in this guide, Burnt Hues, Drift Theory, Faded Reels and Hazy Days, include lots of lush lofi sounds, so let’s make a laid-back lofi hip-hop beat. Begin by setting your project tempo to a chilled-out 90 BPM.
Let’s find a musical loop to give us something to use as a foundation for the rest of the track. Add Komplete Kontrol to a MIDI track, then click the Loop button to show the available loop content, and click the Burnt Hues Samples expansion to display the loops in that pack. Double-click Keys[92] A#m Alderson to load the loop.
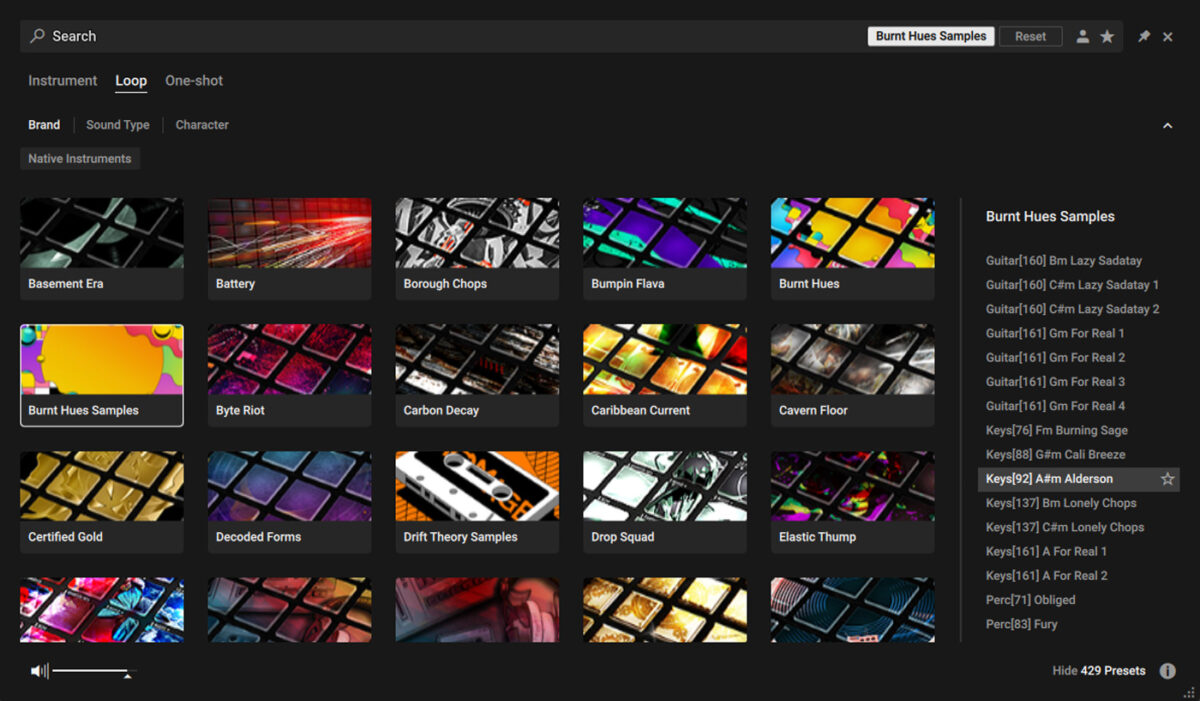
To play a loop back at its original pitch, we play it on C3. Sequence this instrument to play C3 for four bars. We’ll use a velocity value of 100 for everything in this tutorial.

As indicated by the A#m in its name, this loop is in A sharp minor. As we’re playing the loop back on C3, it will play back at A sharp minor. This is important to bear in mind when adding other musical elements: we’re working in A# minor.
That sounds great, but let’s turn this track down to give us some more headroom in the mix to add other elements. Set the track’s volume to -6.7 dB.
2. Add drums
Add another MIDI track and load up Komplete Kontrol on it. Again click on Loop and Burnt Hues Samples, and this time double-click Drums[83] Fury.
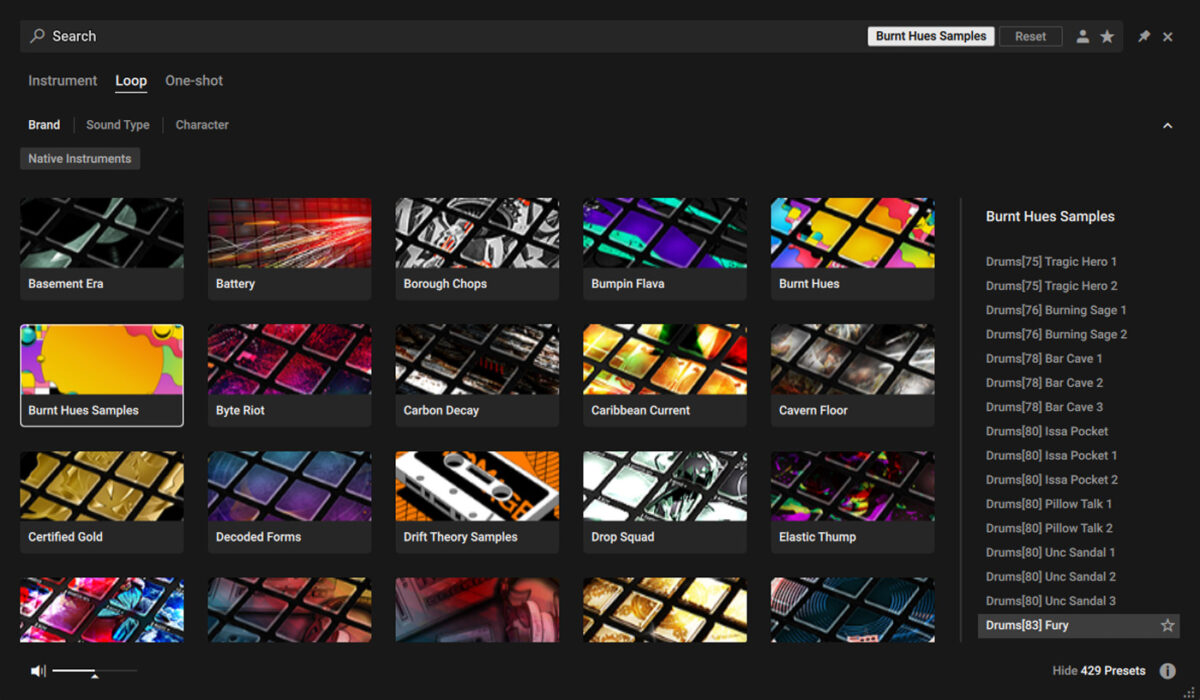
Sequence it to play for four bars. We can see from the “83” in the file name that this loop is recorded at 83 BPM, but on playback Komplete Kontrol will automatically timestretch the loop to fit the project tempo.

To balance it with the keys loop, set its track volume to -6.5 dB.
That sounds cool, but let’s add some more highs to give the beat a bit more energy. Add another Komplete Kontrol track, and this time load the Perc[85] CloseBallad loop from Hazy Days Samples.
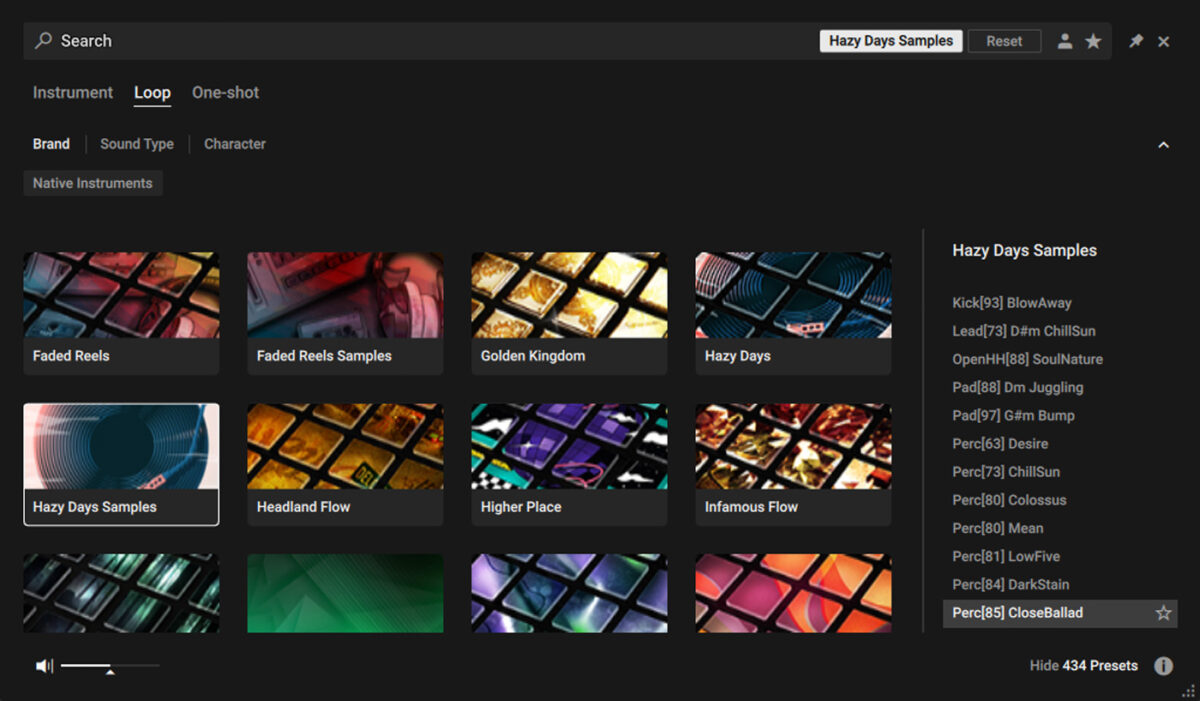
Again, sequence this loop to play for four bars on C3.

This loop sounds balanced at 0 dB, so we’ll leave its track volume where it is.
3. Create a melody and bass line
Let’s add a melody loop. Add another Komplete Kontrol track, and this time load up the Guitar[83] G Soothing loop from Drift Theory Samples.
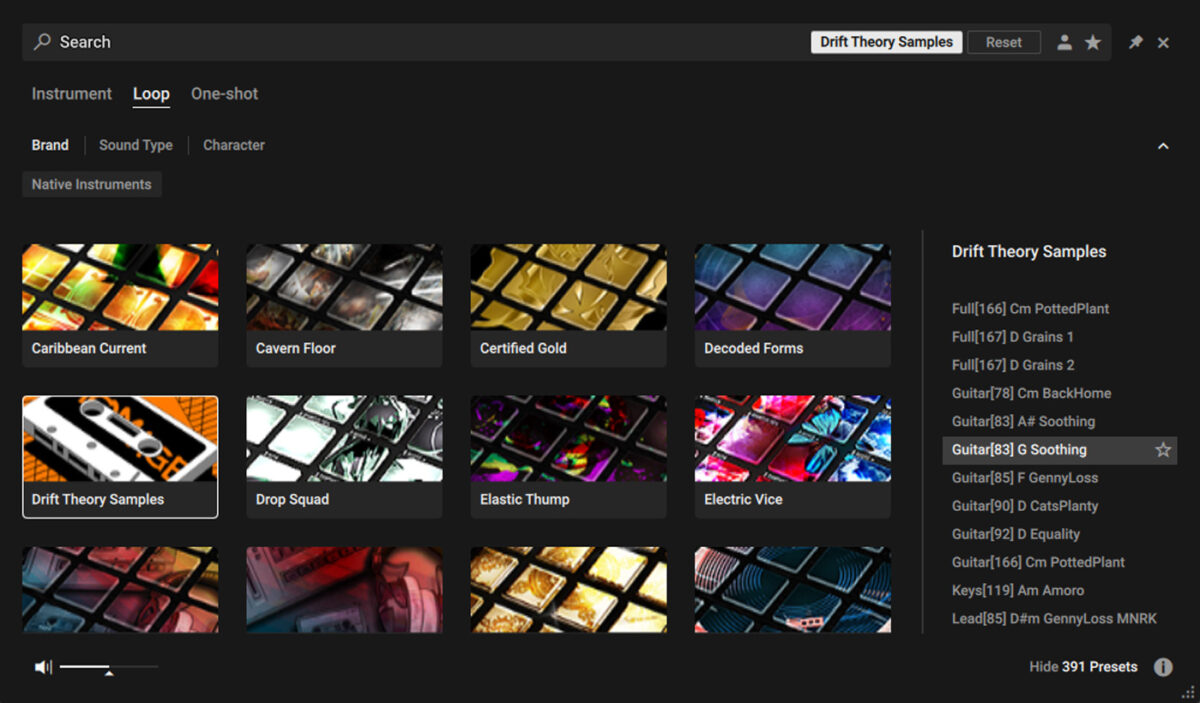
As indicated by its name, this loop is in G. This is three semitones below A#, so we need to play it back three semitones above C3 to have it play with our existing musical loop. Sequence it to play on D#3 for four bars.

Set the track Volume to -7.9 dB.
All these loop elements work well together, so let’s try something a little different: composing a bass line from a one-shot bass sample.
Add another MIDI track, add Komplete Kontrol to it, and this time select the One-shot button, and open the Drift Theory Samples pack. Double-click the Bass Synth C TaxiCab sample.
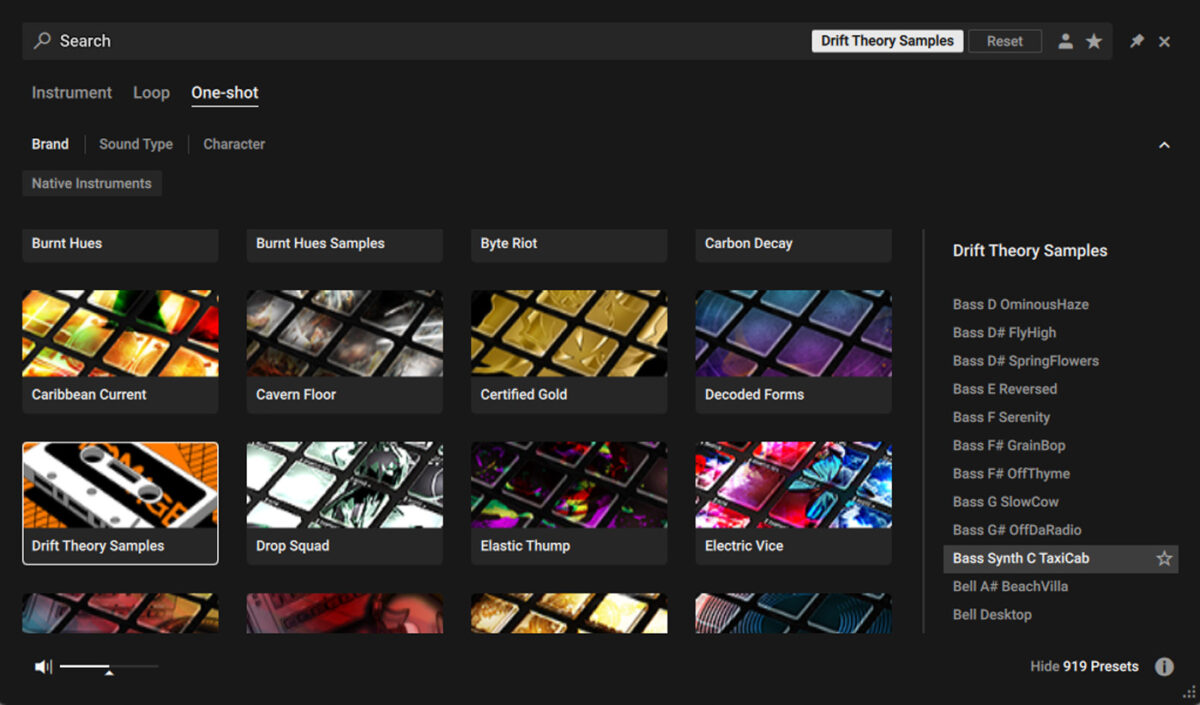
Set the track to -1.1 dB to balance it with the other elements.
Like the musical loop samples, the pitch of this sample is indicated in the file name: C. Because it’s on C, and samples play back at their original pitch on C, we don’t need to transpose it around to get it to play back at the correct pitch. So, we can just go ahead and compose our bass line.
Copy this bass line we’ve created here, or feel free to compose your own bass line.

4. Add ear candy
Now we have our foundational chords, drums, melody and bass, let’s add some more elements to provide sonic interest.
Add another MIDI track with Komplete Kontrol on it, and this time load up the Bell[119] Am Amoro loop from the Drift Theory Sample pack.
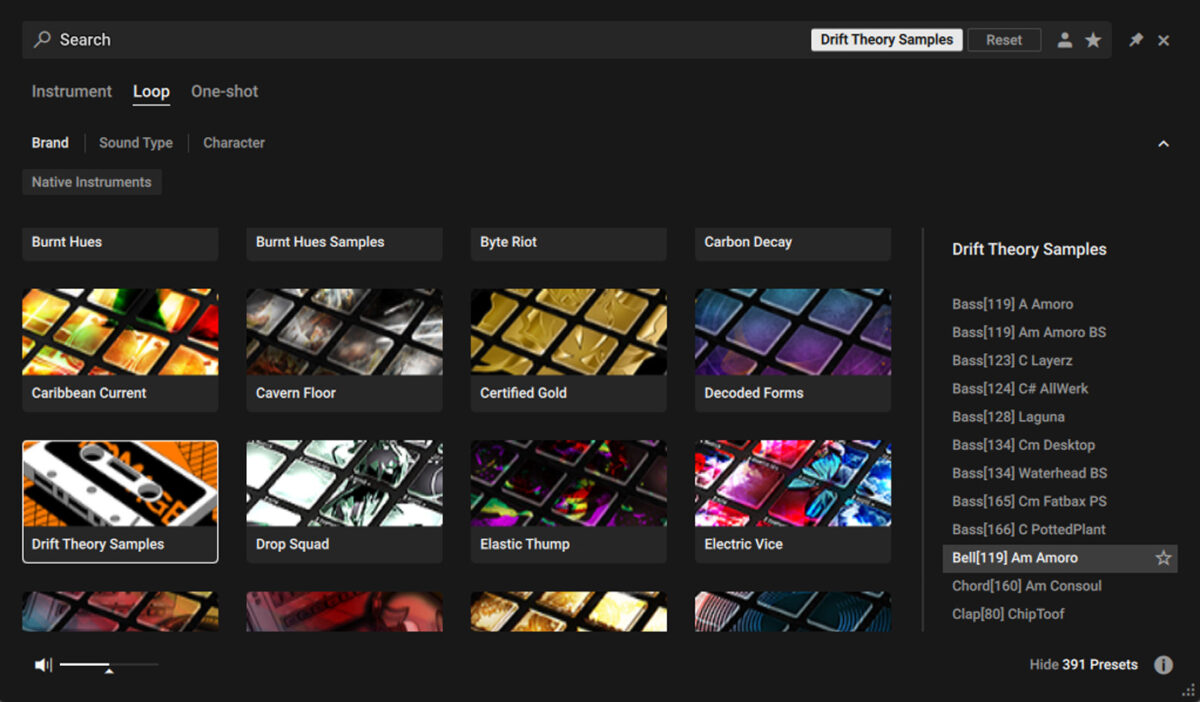
Set this track to -5.1 dB to balance it with the other elements.
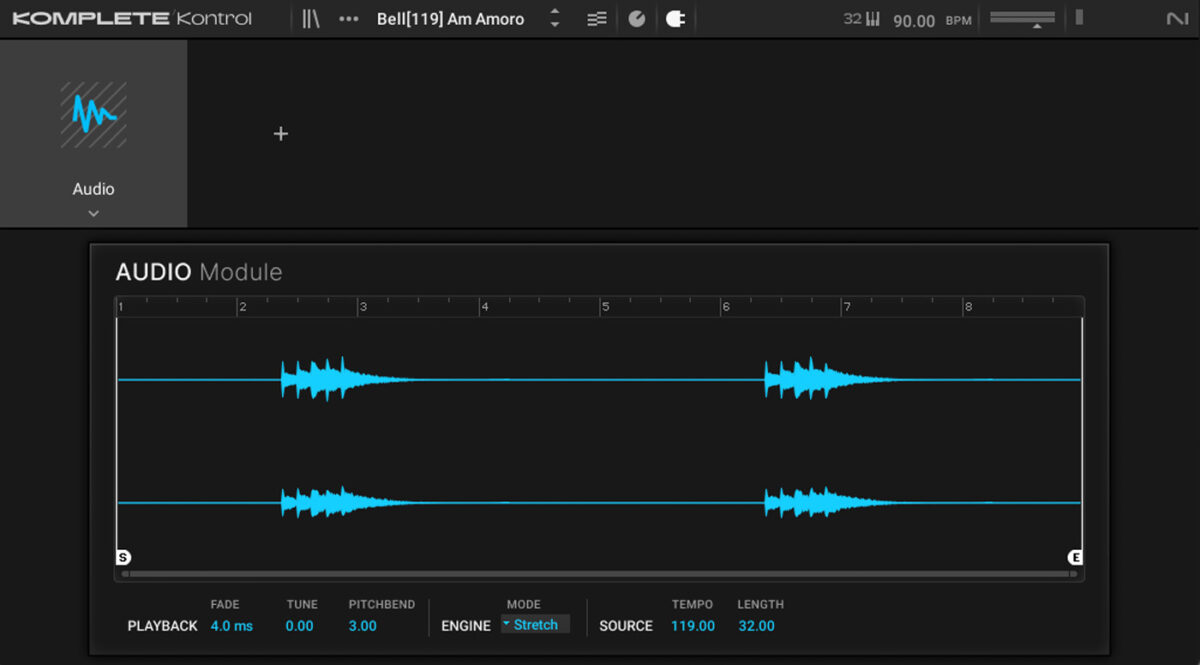
As this sample’s pitch is A minor, it needs to be played up a semitone from C3 to play at A# minor. So, sequence the loop to play on C#3 for four bars.

As we can see from the sample’s waveform display, it doesn’t start playing at the beginning of the first bar. So, we’ll only hear this sound come in during the second bar.
Let’s add some atmosphere to this sound with some reverb. Add Raum to the MIDI track, and load the Factory Presets > Large > Cosmic Keys preset.
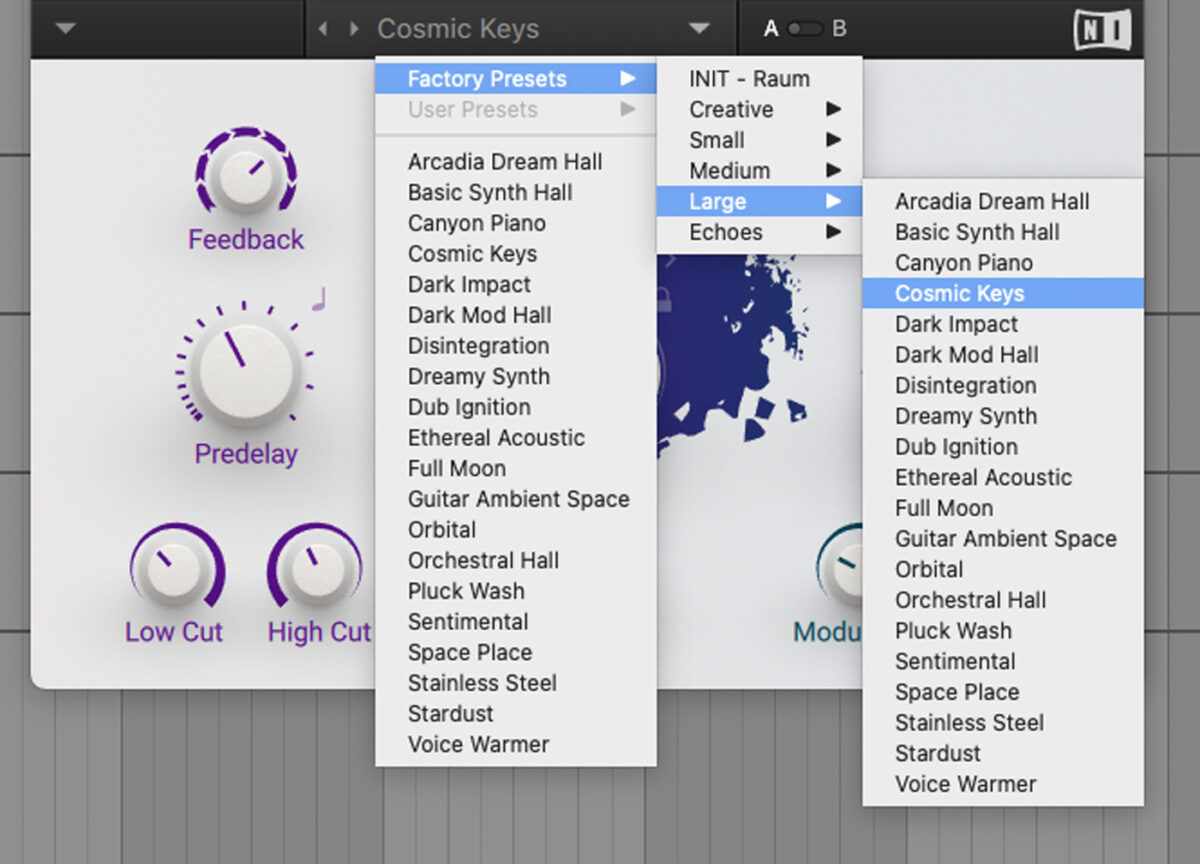
This gives the part an ethereal ambiance that really adds to the feel of the track.
Let’s add a cool synth sound. This time load up the Arp C Lo Suave one-shot from the Faded Reels Samples pack.
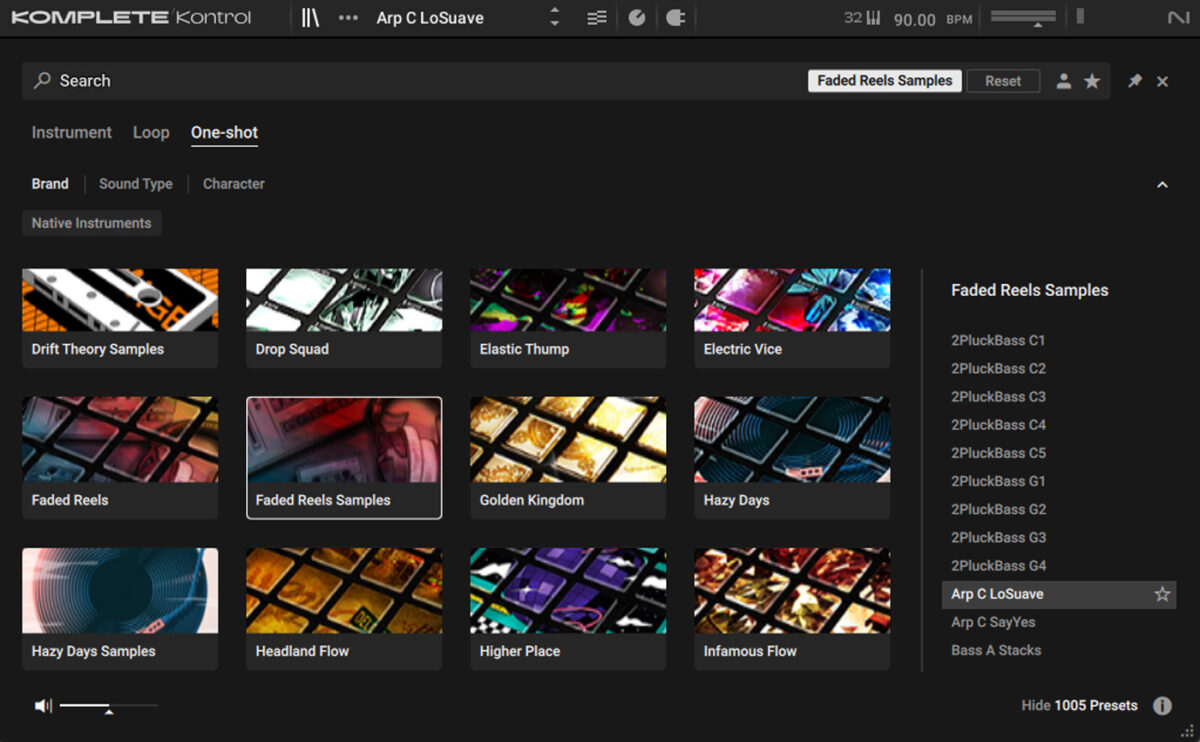
Set this track to -5 dB.
Let’s play this sample back at G# to give us a minor seventh. Sequence it to play G#2 on bar four.

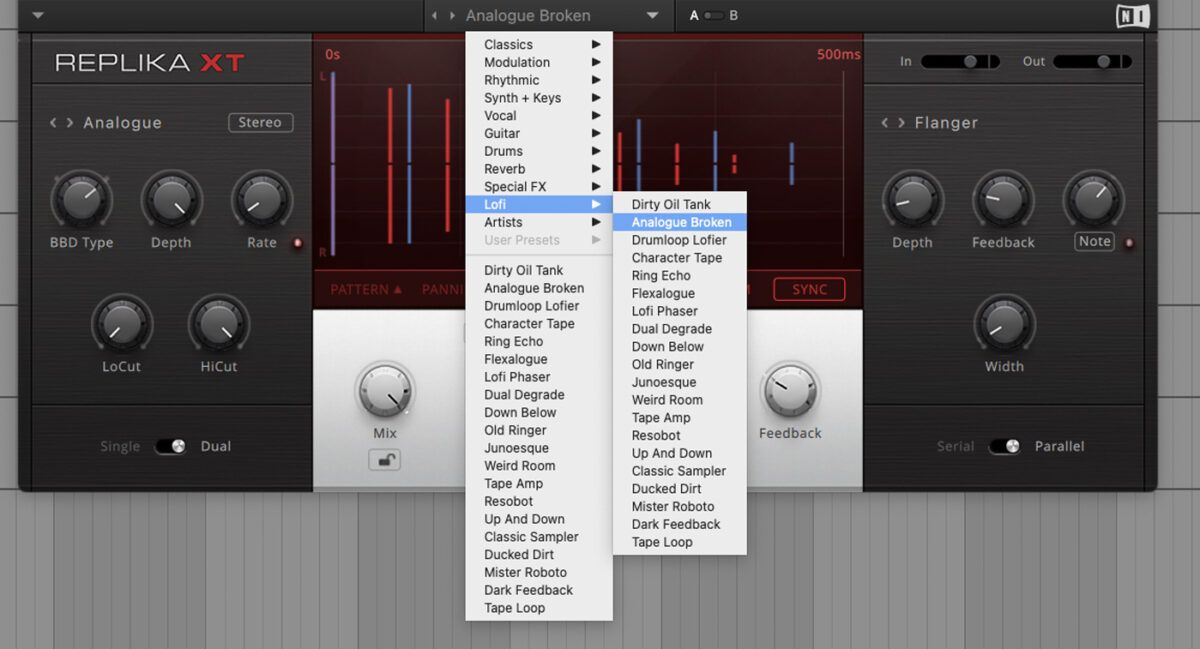
Let’s apply some effects to this sound too. First, add Replika XT, and load up the Lofi > Analogue Broken preset.
Now add Raum and again select the Cosmic Keys preset.
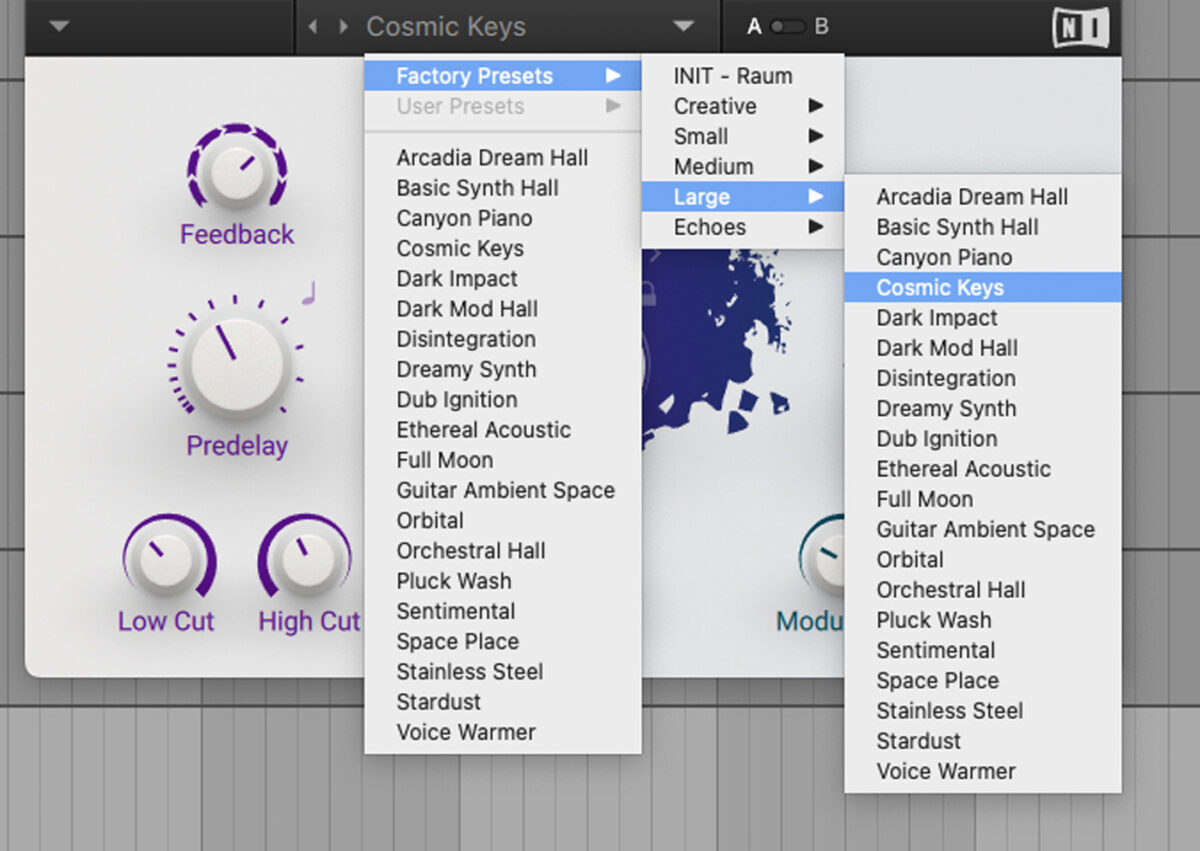
These effects sound great in conjunction, adding another dimension to the synth.
5. Select vocals
As well as playing back samples via Komplete Kontrol, you can also access their files and use them in other software, for example on an audio track in your DAW. Let’s use this technique to add some vocals.
In Komplete Kontrol select Loop and the Hazy Days Samples pack, and locate Vocals[63] G#m Desire 1. Right-click the sample and select Show in Finder (Mac) or Show in File Explorer (Windows) to bring up the folder containing the sample.
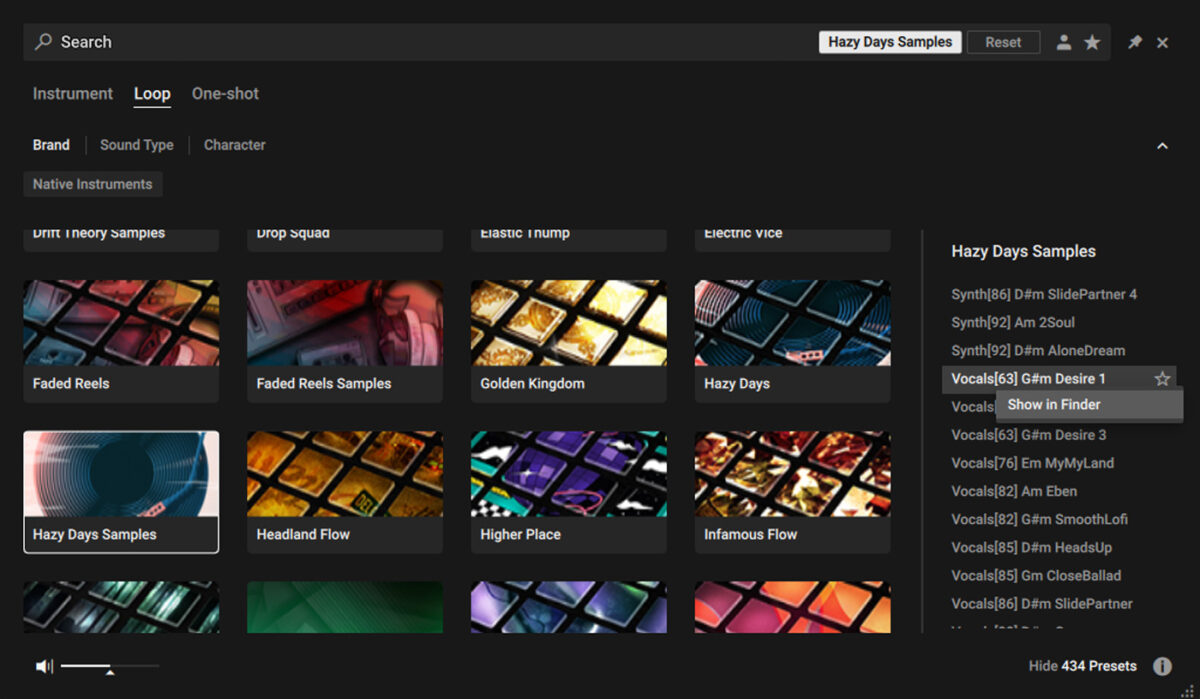
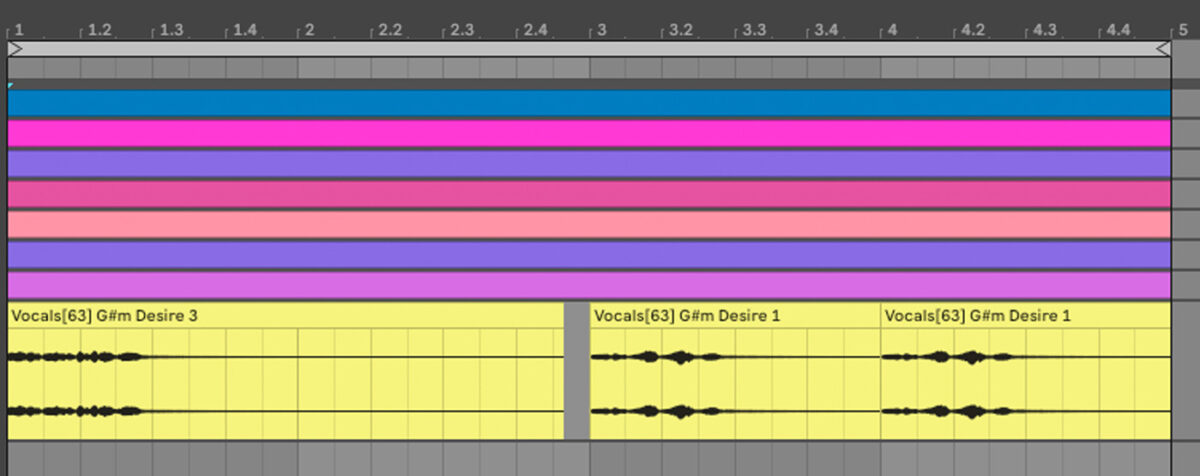
From this folder, drag Vocals[63] G#m Desire 1 and Vocals[63] G#m Desire 3 onto an audio track in your DAW.
Timestretch them from their original tempo of 63 BPM, and pitch shift them up two semitones to transpose them from G# minor to A# minor. If you’re not sure how to do this, please consult your DAW’s manual.

Sequence Vocals[63] G#m Desire 3 to play over the first bar, and Vocals[63] G#m Desire 1 to play over bars three and four.
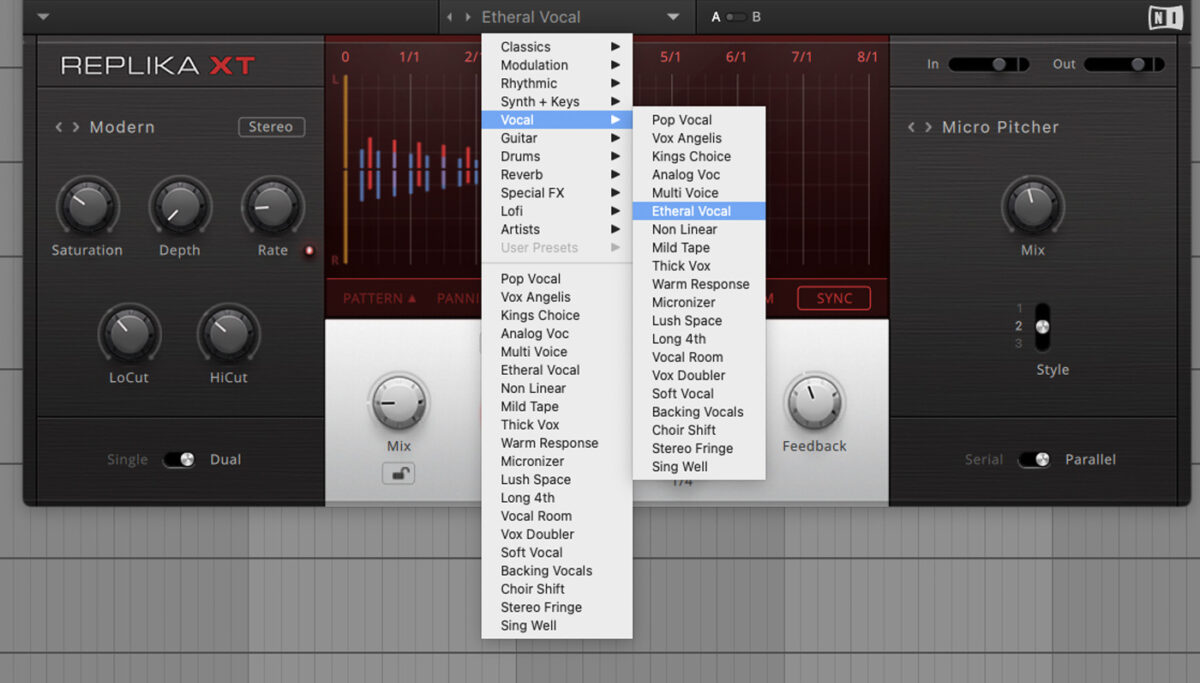
Let’s add some reverb and delay to the vocals. First, add Replika XT, selecting the Vocal > Ethereal Vocal preset.
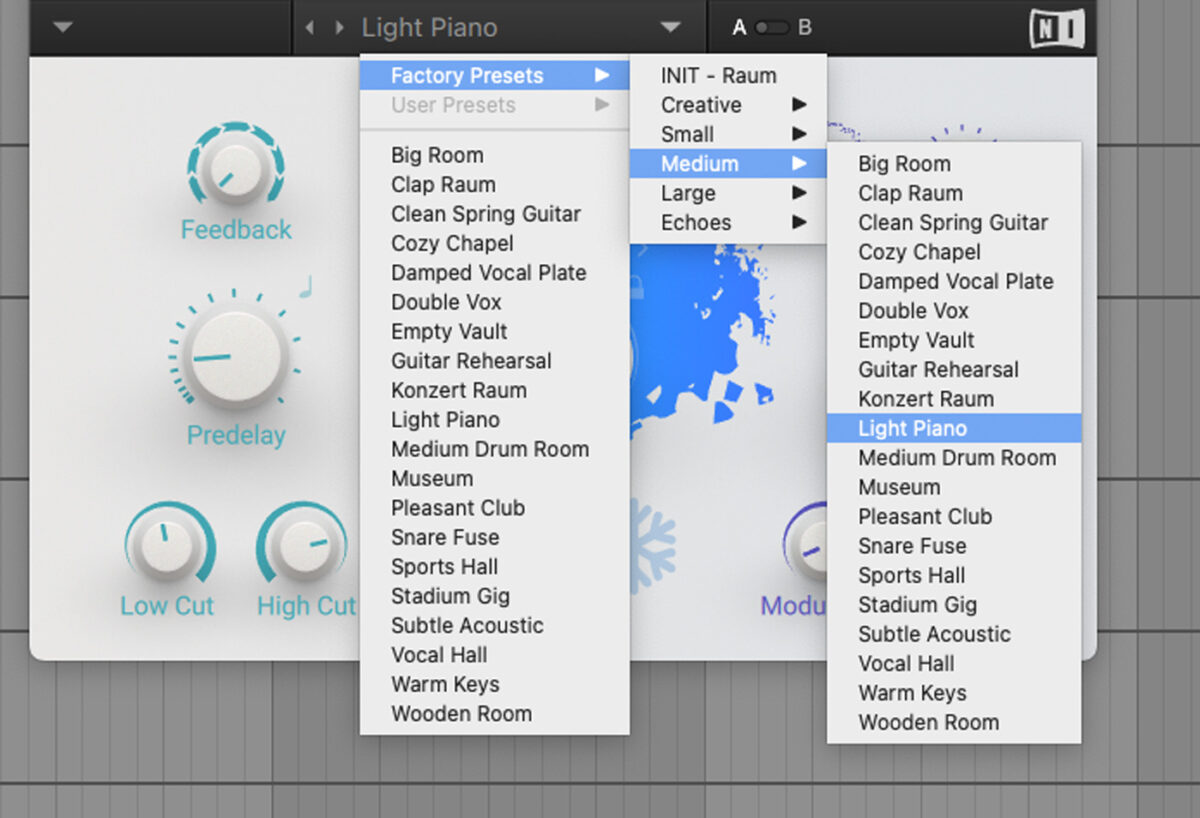
Now add Raum, and select the Factory Presets > Medium > Light Piano preset.
6. Arrange your track
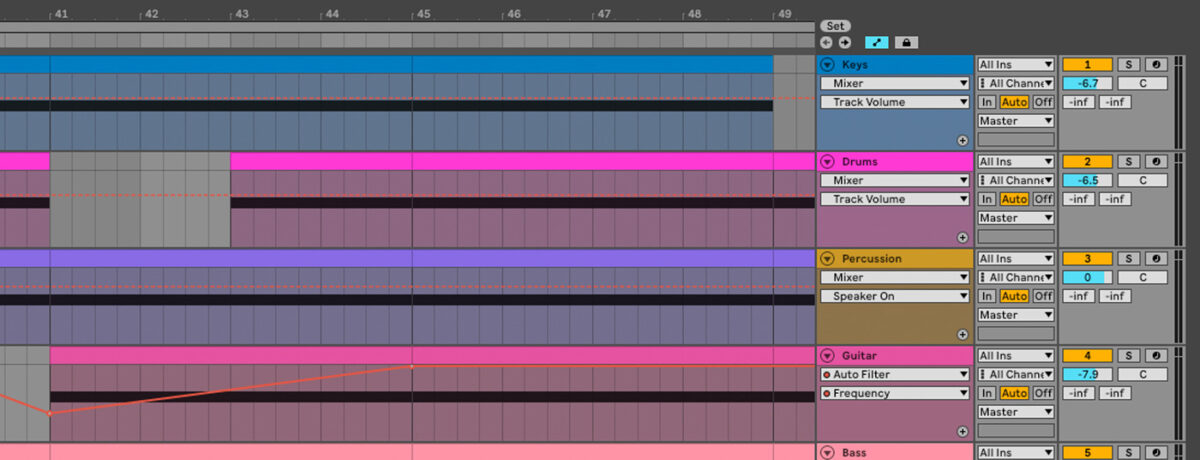
Here’s an arrangement you can copy to get a dynamic feel.

Note how the ear candy sounds are used to transition between sections, and various elements are brought in an out to create interest. In particular, at bar 41 the beat drops out for a couple of bars to create a fake breakdown, and during the bar 41-45 section a low-pass filter is automated to open up on the guitar track, creating a dynamic section that keeps things interesting.
Start using samples in music
Here we’ve seen how you can use sample packs to create a piece of music from scratch.
If you’d like to read more check out Music production 101: How to start producing music, 5 ways to use vocal samples in your music, and Hip hop sampling 101.
And don’t forget that you can pick and choose your favorite packs for only $14.50 this Summer of Sound, or bundle up with all five for only $49.50.